Back to all Lessons

Free Classroom Kit

C is for Corn

Grade Level: Kindergarten

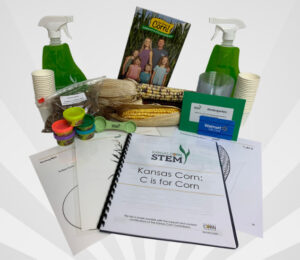
Students will explore the parts of corn, the sounds of the phoneme hard C, and patterns. Students will infer through evidence where corn comes from and what animals might eat corn. Students become scientists during a hands-on lab lesson, discovering similarities and differences of field corn and Indian corn, with beginning development and understanding of inheritance.

Teaching the Lesson

Kansas College and Career Ready Standards

Science

  • K-LS1-1. Use observations to describe patterns of what plants and animals (including humans) need to survive. Mathematics
  • CCSS.Math.Content.K.MD.A.1. Describe measurable attributes of objects, such as length or weight. Describe several measurable attributes of a single object.
  • CCSS.Math.Content.K.MD.A.2. Directly compare two objects with a measurable attribute in common, to see which object has “more of”/”less of” the attribute, and describe the difference.
  • CCSS.Math.Content.K.MD.B.3. Classify objects into given categories; count the numbers of objects in each category and sort the categories by count.

English Language Arts

  • CCSS.ELA-Literacy.W.K.7. Participate in shared research and writing projects (e.g., explore a number of books by a favorite author and express opinions about them).
  • CCSS.ELA-Literacy.W.K.8. With guidance and support from adults, recall information from experiences or gather information from provided sources to answer a question.

Learning Objectives

  • Students will describe and name the parts of a corn plant and an ear of corn.
  • Students will identify the hard C/c phoneme they hear.
  • Students will explore patterns by handling an ear of corn and Play-Doh.
  • Students will describe the process it takes to grow corn.
  • Students will communicate the idea that all living things need water to live.
  • Students will explore, detect, and verbally state the similarities and differences between field corn and Indian corn.
  • Students will identify the colors needed to produce the pattern of Indian corn to be like, but not exactly like, the parent Indian corn.

Materials

For each student:

For each pair of students:

For Class:

  • Paper for word wall/pocket chart/class white board
  • Dry erase marker/marker and dry eraser
  • We Grow Corn: Raising Corn on a Kansas Family Farm book* (also available at www.wegrowcorn.com)
  • Vocabulary and definition slide (available in C is for Corn PowerPoint)
  • Soil pellets for each cup*
  • Sharpie marker
  • Sunny location to grow plants
  • Spray bottle*
  • Scotch Tape
  • Masking Tape
  • Picture of the letter C/c *
  • Parts of a Corn Plant worksheet *
  • Parts of an Ear of Corn worksheet *

For Teacher:

*Items will be included in the free teacher kit.  Request materials

Safety Considerations

  • Do not put corn kernels in ears, nose or mouth.
  • Do not throw the corn kernels.
  • Do not spray the water bottles at anyone; spray only the cup with the seeds.
  • Do not splash the cups of water at anyone.
  • Do not eat the Play-Doh.
  • Be aware of student allergies to corn or seeds treated with chemicals. (Untreated seeds are provided)

Lesson 1: Parts and Sounds of Corn (30-40 minutes)

Key Questions

What are the parts of a corn plant? What are the parts of an ear of corn? How can we describe them?

Learning Objectives

  • Students will describe and name the parts of a corn plant and an ear of corn.
  • Students will identify the hard C/c phoneme they hear.

Materials

C is for Corn PowerPoint (optional)

Procedures for Instruction

STEP 1  Introduce the topic of corn and assess students for prior understanding:

  • Pair students together.
  • Give each pair of students a picture of a mature corn plant (pg. S7) for them to examine.
  • Ask students to work in pairs and describe the parts of corn with their partner. They can make up names based on the appearance and/or assumed function of the plant parts. (Listen in on what students are saying. This allows you to assess students’ prior understanding.)
  • Verbally share some of their observations and names for parts.
  • Bring students’ attention to where the ear of corn is shown on the plant picture.

STEP 2   Introduce the hard C phoneme:

  • Introduce the hard C phoneme: “When we say corn, what is the first sound our mouths make?” “How do we represent that in letters?” Students may indicate both K/k and C/c.
  • Show students a picture of a letter C/c. “What sound does the letter C/c represent?” “What words do you know that have the C/c sounds?”
  • Write the word “corn” on the board or word wall, emphasizing the hard C/c sound. “What letter does corn begin with?”
  • “Today, we will talk about the letter C/c and an ear of corn. We will be listening for the C/c sounds and learning about the parts of an ear of corn.”

STEP 3  Explore an ear of corn:

  • Hold up an ear of corn with husk. Explore with the students the parts of an ear of corn. “You may turn it over and over, peel layers back, and see what you find! Have them pass corn with husk around for exploration. Can you describe how it feels, how it smells, how it looks, or how it sounds?”
  • Verbally share: “What did you find? What parts did you find? How do they feel? Smell? Sound?

STEP 4  Name the parts of an ear of corn:

  • Using an ear of corn still in the husk as your model, identify and name the parts of an ear of corn. Use an anchor chart to draw a picture of an ear of corn and label the parts. Photos also available on C is for Corn PowerPoint (available at www.kansascornstem.com.)
  • Point to the outside of the ear (husk). “Did you peel this part back? How does it feel? Smell? Did you give it a name? Does anyone know what farmers call it?” Write HUSK on the board.
  • Peel the husk back and point to the silk. “Did you find this part? How does it feel? Smell? Did you give it a name? Does anyone know what farmers call it?” Write SILK on the board.
  • Peel down the husk and silk to the kernels. “Did you find this part? How does it feel? Smell? Did you give it a name? Does anyone know what farmers call it?” Write KERNELS on the board.
  • Ask students if we can eat any of the parts.
    • “Does anyone agree/disagree with ______ said? Why or why not?”
  • “How do we know?” (Let students begin to organize thoughts and give them some time to think.)
  • “Are there any other living things besides people that could eat this?

STEP 5  Lead further discussion by asking questions such as:

  • “Where does corn come from?” (You may get a variety of answers, but steer toward farming.)
  • “Where does corn grow?” (field/farm/garden/soil)
  • “Who grows the corn on a farm?” (farmer)

STEP 6  Guide the discussion toward questions about the letter C/c by asking questions such as:

  • “Do you know who gave me this corn? Well, it was a farmer. Someone that grows corn. She gave me this corn so I could teach you about it.”
  • “Guess what? The farmer needs some help! She asked me if you would be able to help remove the corn from the cob….oh!…COB…/C/…/C/begins with C.” (Begin word wall/chart for words that begin with C/c)

STEP 7  Students should remove kernels from cob and run hands through tub of corn kernels. They will be using their tactile and motor skills.

  • “Shall we help the farmer?”
  • Pair students into partners. Distribute tubs or pails and a cob of corn to each pair.
  • Instruct students to take kernels off the cob and show them how to twist their hands back and forth on the cob to remove the kernels so they fall into the tub or pail. Remind them to take turns with their partner. Remind them of the safety rules listed above.
  • Leave some kernels on the cob for a future lab lesson (see below).
  • Let them run their hands through the kernels in a large tub or bucket to feel the kernels.
  • Ask students if they can describe how it feels.

STEP 8  Close the lesson in anticipation of the investigation coming up:

  • “The farmer is going to be so excited that we got some of the corn off the COB for her. It is hard work, isn’t it?” (Leave some kernels on the cob for lab lesson.)
  • “Tomorrow, we will explore what we can do with an ear of corn and some Play-Doh.”
  • “Hmm, I wonder what that will be?”

Formative Assessment

While partners work together, the teacher can go to each group and have them verbally tell him or her the parts of the ear of corn. The teacher can use a checklist for his or her records. (If students have difficulty recalling the parts, have them refer to the class anchor chart for support.) Students can also be given the Parts of a Corn Plant worksheet (pg. S2 )and Parts of an Ear of Corn worksheet (pg. S3) as an assessment or activity or worksheets can be used instead of drawing an anchor chart for bullet number 4 on page T5.

Note

Students’ hands may get tired removing the kernels from the ear of corn; therefore, partner work is suggested. Several dishpan tubs may be useful during this time. Begin a word wall or chart for all the words that begin with C/c to use throughout lessons.

Lesson 2: Corny Patterns (20 minutes)

Key Question

What is a pattern?

Learning Objectives

  • Students will explore patterns by handling an ear of corn and Play-Doh.

Materials

  • For each student:
    • Small ball of Play-Doh
    • Roller
    • Kernel of corn
    • Cob of corn (with some corn kernels left on)
  • Class word wall (from previous lesson)
  • Dry erase marker and dry eraser

Procedures for Instruction

STEP 1  Introduce the topic and elicit prior learning with questions and statements such as:

  • “Who can help me name the parts of the corn?” (husk, silk, kernels)
  • “What words start with the letter C/c?” (pointing to word wall)
  • “Today, we will use the corn that we removed from the cob and leftover corn still on the cob. Each of you will get a small ball of Play-Doh, a roller, and a cob with corn still on the cob.”
  • Model what students will be doing. (Name all objects, use roller, kernel, etc.)

STEP 2  Start the exploration:

  • Have students use the rollers to roll the Play-Doh flat.
  • Have students lightly use their finger to trace the letter C in the Play-Doh.
  • Then, have students use one kernel of corn to trace or write the letter C on the Play-Doh.
  • Have students turn over Play-Doh and roll it out more so it is flat again.
  • Pick up the cob with kernels on it and roll it on the Play-Doh.
  • Have students play with the patterns they create. Can they find the repeating patterns? Do they connect the patterns from the cob to those in the Play-Doh?

STEP 3  Discuss the patterns:

  • “What do you see in your Play-Doh?”
  • “Would anyone like to share and explain what they see?” (Let several students share their thoughts.)
  • “What do you see that looks the same?”
  • “Does it look like your neighbors? Why or why not?” (This is where students learn and develop the idea of a pattern.)
  • “Does it repeat? How?”
  • “How was the pattern made?”
  • “This is a type of pattern.” (Students need to get a concept of what a pattern is and means.)

STEP 4  Close the lesson in anticipation of next lesson:

  • “Today, we made patterns with our corn and now we know what a pattern is. Tomorrow, we will be reading a book about corn and explore all the things a farmer must do to produce corn.”

Formative or Embedded Assessment:

Students will be able to create and produce a pattern using the corn and explain that it made a pattern in the Play-Doh.

Note

Add words that begin with C/c to the word wall that you have discussed in this lesson. To make rollers, you may take a wooden dowel rod and cut them into 6-in. pieces.

Lesson 3: From Kernel to Corn (40 minutes)

Key Questions

Where does corn come from? Who produces corn? How is corn produced?

Learning Objectives

  • Students will describe the process it takes to grow corn.
  • Students will communicate the idea that all living things need water to live.

Materials

  • For each student:
    • Clear cup
    • Soil pellets for each cup
    • Spoon
    • Dixie cup
    • Kernels of corn
    • Masking tape
  • We Grow Corn: Raising Corn on a Kansas Family Farm book
  • Vocabulary and definition slide (available in C is for Corn PowerPoint)
  • Class word wall from previous lesson
  • Sharpie marker
  • Sunny location to grow plants
  • Spray bottle
  • Class whiteboard or paper
  • Dry erase marker and dry eraser
  • Growing Corn worksheet (pg. S6)
  • C is for Corn PowerPoint

Prepare before lesson: Add 1 soil pellet to each cup, pre-measure water to add to pellets, per soil wafer bag instructions, and label cup for students with tape.

Procedures for Instruction

STEP 1  Introduce the topic and elicit prior learning with questions such as:

  • Who can explain what a pattern is?
  • Can someone explain how we made a pattern yesterday?
  • Where did the corn cobs we used come from?

STEP 2  Begin read-aloud with students:

  • “Today, we are going to read a book about corn. We will want to look for ways farmers grow corn.” Introduce new vocabulary in the book (vocabulary and definitions).
  • Begin read aloud.

STEP 3  Discuss the read-aloud with such questions as:

  • Where does corn come from?
  • What animals might eat the corn? Use C is for Corn PowerPoint (available at www.kansascornstem.com.)
  • What is a combine? (Note, this begins with C and has the hard C phoneme. Add it to the word wall.)
  • “If the farmer runs out of corn and needs more corn to feed to his or her animals, what will the farmer need to do?” (Grow some corn.)

STEP 4  Start the investigation, by stating, “We are going to help the farmer grow some corn right here in our class-room!”

  • “What do we need to grow corn?” (soil, water, seeds/corn kernel, sunlight)
  • Model for students what they will be doing.
  • Give each student a clear cup with soil pellets added and a spoon. (Prepare before lesson.)
  • Give each student a dixie cup of pre-measured water and have them add it to the cup with soil in it. (Students that pour unsteadily may use a syringe to add the water) (Pre-measure amount of water per soil wafer instructions)
  • Students will begin to stir the water and soil together with their spoons in the cups.
  • Direct their attention to what is happening in the cups with wonder: “Do you know what you are doing right now? You are rehydrating the soil by putting water in it.”
  • “What is happening to the soil wafers?” (Soaking up the water). “This is called rehydrating the soil so we can plant a seed in the soil. Because without water, the seed will not be able to grow.”
  • Give each student four kernels of corn and have them poke them down in the soil with their finger. (Model this for students. Don’t poke them too deep.)
  • Place cups in a sunny window and watch your corn grow. (Takes 5-10 days to sprout.)

STEP 5  Discuss that all living things need water, and prepare students to water their cups over the next several days.

  • “What do plants need to grow?” Water. (Write this on the board or chart, so students can see this.)
  • “What do animals need to live?” Food, water. (Add to chart or board.)
  • “What is one thing both of them need that is the same?” Water.
  • “Could we say the same about us?” Yes.
  • “What do all living things need.” Water.

STEP 6  Close the lesson in anticipation of the next lesson:

  • “Today, you helped the farmer produce more corn. You know that it takes soil, water, seeds, and sun to grow more corn for the farmer. We are going to watch our corn over the next couple of weeks and see what happens.”
  • “You also know that all living things need what? Water!”
  • “Tomorrow, we are going to compare field corn that the farmers grow and Indian corn that has many colors on the cob.”

Note

Be sure to have students water their cups of soil and corn with spray bottles over the next few days, keeping the soil moist but not drenched.

Formative or Embedded Assessment

Students are able to verbally describe the process it takes to grow corn and that all living things need water to live. The Growing Corn worksheet (pg. S6) can also be used as an assessment, either for this lesson or at the conclusion of the unit.

Summative or Embedded Assessment

Students will verbally explain that the farmer has to plant corn, which needs water to grow, to produce more corn for her animals to eat.

Lesson 4: Corny Sorting (20 minutes)

Key Questions

How do we know which kernel came from field corn and which kernel came from Indian corn? Do they look like, but not exactly like, their parents?

Learning Objectives

  • Students will explore, identify, and verbally state the similarities and differences between field corn and Indian corn.

Materials

  • For each student:
  • Field corn and Indian corn kernels (enough for each student to have for sorting)
  • Pencil
  • Balance scales (optional)
  • Sorting mat (pg. S4-5)

Prepare cups of mixed kernels and sorting mats beforehand.

Procedures for Instruction

STEP 1  Introduce the topic and elicit prior learning with questions such as:

  • “Today, we will explore another kind of corn that can be grown, called Indian corn. What is different about field corn and Indian corn?” (Hold up ears of each type of corn.)
  • “If I wanted to sort out the field corn from the Indian corn, how could I do it?” (Let student demonstrate or verbally tell how to do it.)

STEP 2  Exploration: students sort the types of corn.

  • “Today, we are going to be sorting our corn kernels on our sorting mats. (pg. S4-5)” (Review safety rules again. Model the process to the students.)
  • “First, you will put your sorting mat in front of you.”
  • “Next, you will take the cup of mixed kernels and begin sorting them on your mat. All the field corn kernels will go on one side, and the Indian corn will go on the other side of the mat.”
  • Have students get their sorting mat and a cup of mixed kernels. (Prepare cups and mats before lesson.)
  • Begin sorting.
  • Model how to clear your mat. Have the student tell you the steps and clear their own mats.

STEP 3  Evaluate and discuss through questions and activities such as:

  • “How many do you have of each kernel?” (The answers will vary. You can give time for students to count.)
  • Optional: “Could we weigh our kernels to see which kind of corn weighs the most?” (Have students place each type of corn in a cup, then weigh on balance scale and compare.) “Does one corn weigh more than the other? Why? How do you know?” (Give wait time here. This may be challenging for students to form ideas and explain them.)
  • Can you come up with another way to sort the kernels? (size, color)

Lesson 5: How Can You Tell? (40 minutes)

Key Questions

What things are the same about all the corn kernels? What things are different among the corn kernels? What kind of corn will each kernel grow? How can you tell?

Learning Objectives

  • Students will detect and verbally state the similarities and differences between field corn and Indian corn.
  • Students will identify the colors needed to produce the pattern of Indian corn to be like, but not exactly like, the parent Indian corn.

Materials

  • Ear of field corn
  • Ear of Indian corn
  • Kernel of field corn
  • Kernel of Indian corn
  • For each student:
    • Crayons (yellow, green, brown, black)
    • Corn pattern coloring sheets (pg. S8-10)
    • Glue/glue stick
    • Roll of scotch/clear tape
    • Pair of scissors

Procedures for Instruction

STEP 1  Introduce the topic and elicit prior learning with questions and statements such as:1

  • “Who can recall what it takes to grow corn?” (Soil, water, seeds, sun)
  • “Today, we will compare Indian corn to the field that farmers grow to feed their animals.”

STEP 2  Lead further discussion so students explore ideas about where corn comes from, by asking questions such as:

  • Hold up an ear of field corn and an ear of Indian corn. Observe the patterns of Indian corn.
  • “What is the same about the two types of corn?”
  • “Could someone add to what ____ just said?”
  • “What is different about the two types of corn?”
  • “Do the kernels look the same?”
  • “How can you tell?” (Give wait time here. This may be challenging for students to form ideas and explain them.)
  • “If we plant field corn like we did in our cups, what kind of corn do you think it will grow and produce?” Field corn. “What will it look like?” Field corn.
  • “If we plant the Indian corn like we did in our cups,” (Show ear of Indian corn.) “what kind of corn will it grow and produce?” (Indian corn.) “What will the Indian corn look like?” (Indian corn, one with many colors of kernels.)

STEP 3  Start exploration:(Corn Pattern Coloring Sheets)

  • “When a kernel of corn is replanted and it grows and produces another ear of corn, the new corn will look like, but not exactly like, its parents.
  • “If we take a kernel of field corn (hold it up) and plant it, it grows and produces an ear of corn that will be like, but not exactly like (hold up ear of field corn), its parents.”
  • “This is the same as the Indian corn. If I take a kernel from the Indian corn (hold it up) and plant it, it will grow and produce an ear of corn it will be like, but not exactly like (hold up ear of Indian corn), its parents. It is possible that the sizes of the kernels may change or the length of the ear of corn may get longer or shorter.”
  • Hold up Corn Pattern Coloring Sheets (pg. S8-10). “We are going to say this was produced from a kernel of the Indian corn (hold up ear of Indian corn). What colors of crayons do we need to make it look like the ear of Indian corn pattern? What colors do you see in the Indian corn?” (Have students color the colors they see.) Hint: You may wish to place an ear of Indian corn on each table while the students are coloring it.
  • Next color the husk, and tape it to the Indian corn so it can still flip up and reveal the corn. (Model the steps for students.)

STEP 4  Close the lesson with discussion

  • “When a kernel of corn is replanted and it grows and produces another ear of corn, the new corn will look like, but not exactly like, its parents.
  • “Today, we compared field corn to Indian corn. We talked about what was the same and what was different.”
  • “How can we tell what the parent plant of Indian corn looked like?”
  • “How can we tell what the parent plant of field corn looked like?”
  • “How do we know? How can we tell?”
  • “We learned that when we plant a kernel of corn, it will produce an ear of corn that is like, but not exactly like, its parents.”

Formative or Embedded Assessment

Students are able to identify and verbally state the similarities and differences of field corn and Indian corn. They can identify the colors needed to produce the pattern of Indian corn on the coloring sheet to be like, but not exactly like, the parent Indian corn.

Reflection

  • Let’s talk about what we have learned about corn. We have learned about the letter C and all the words that begin with C.
  • Can you tell me some words that begin with the letter C? (Look at word wall to help students.)
  • Who can recall the parts of the corn? (Hold up picture of corn to help students recall.)
  • Who can explain the process of growing the kernel?
  • What do all living things need? (water)
  • When the farmer needed more corn for her animals, what did she do? How did she solve her problem?
  • How did we know (when sorting) which kernel was field corn and which kernel was Indian corn?
    • Give wait time for thinking on this. You may need to hold up field and Indian ears of corn to help with students thinking.
  • How did you compare the field corn to the Indian corn?
  • How can you tell what type of parent plant Indian corn had?
  • Did they look like, but not exactly like their parents?
  • Who can recall what a pattern is?
  • Who can explain how you made a pattern?

Formative Assessments

Students will verbally answer and explain questions above within a group setting, adding to the thinking of one another’s thoughts.

Summative Assessments

Have students illustrate a drawing showing “Farmer Brown” with a problem and them solving the problem.

  • Teacher says: Farmer Brown has a problem. She has no corn to feed her animals. What shall she do?
  • The illustration should show corn planted and rain or some type of water that will water the seeds.
  • Or present a sequence of pictures that students need to put in correct order to show how to solve ‘Farmer Brown’s problem.

Teacher Resources


About Kansas Corn STEM

Investing in Kansas teachers and students is a priority for the Kansas Corn Commission. We are committed to providing materials and training to support STEM education while fostering an understanding of how corn farming and agriculture fit into our daily lives. All K-5 lessons come with a free teacher kit that includes the teaching materials needed for each lesson.

Request Materials

This lesson is the work product of the Kansas Corn Commission. Our lessons are written in collaboration with Kansas teachers for use in the classroom. Teachers may copy and share this curriculum. Use of this product for commercial or promotional use is prohibited without express permission of Kansas Corn.

Newsletter Sign Up

Each quarter we release a newsletter written by teachers for teachers. This is an easy way to keep up with what is happening at Kansas Corn STEM.

Subscribe Today!